General instructions for preparing an area before painting
General instructions for preparing an area before painting
The right method for every surface
General instructions for preparing an area before painting of new and old concrete surfaces, metal and iron, aluminum, galvanized and stainless steel, plaster walls and cement plaster, wood
Note : The instructions for preparing the area below are general and are not associated with a specific material or product. The instructions are given as a general guideline. and intended for professionals with knowledge and experience in the application of the various paint systems on various infrastructures. It is the user’s responsibility to ensure the appropriate type of surface preparation. the suitability of the product for the infrastructure and the uses for which it is intended. It is recommended to read the technical specifications and safety instructions of the product before application. Any question or uncertainty should be consulted with the technical department at the Denver company. With Kogan Baruch or Dr. Belen Evgenia.
The right method for every surface
General : It is the preparation of the surface that largely determines the longevity of the coating. – and therefore its great importance. The goal is to prepare a proper surface. – Stable and clean. that enable adhesion – good and sustainable adhesion of the system to the infrastructure. The surface must be clean, dry. stable and without loose parts or areas. Any remaining grease must be completely removed. – Dust, dirt, salts and any other foreign matter. In order to ensure the adhesion of the coating to the surface. Level infrastructure, stable, free of pollutants. – Free from loose parts and has a suitable surface for painting/coating. With roughness/porosity that increases the surface area for paint adhesion. – Ensure perfect adhesion of the paint/coating layers to the infrastructure. You will prevent the separation of the paint/coating layer and extend the life of the system.
The cleaning and surface preparation methods can be characterized by different components, but they all have the same goals: removal of rust and ring scales, removal of salts, removal of oils, dirt and dust, removal of old coating layers, polishing of areas with sharp edges, roughness / polishing of old paint with a hard finish, up to For a clean, stable surface with a uniform roughness level.
The right method for every surface
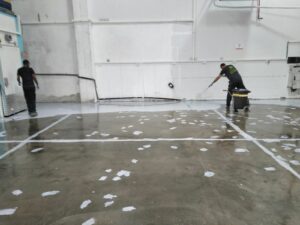
New concrete : Pouring new concrete can be coated about 4 weeks later (28 days at a temperature of 25 O C) after pouring and only with a moisture content of no more than 4% at a depth of 2.5 cm below the surface. The concrete must have strength A minimum pressure of 30 Mpa, when this requirement is not met, recommended solutions for strengthening the infrastructure must be included. The preparation of the area must follow the requirements of the SSPC-SP13 standard, for a dry concrete surface, free of pollutants, without cement water, loose parts and dust, with uniform flatness, Mechanical strength and a sufficiently porous upper profile that allows adequate absorption of the coating.
Preparation of the concrete surface – complete removal of mold oil, curing agents, salts, blooms, cement water and any other foreign matter, using sandblasting or shot-blasting, mechanical milling, diamond polishing or acid digestion. In addition, it is important to make sure that the pH of the concrete is between 10-12 (in any case, follow the instructions in the following standards: ASTM D 4259 – Procedure for preparing concrete for grinding the surface. ASTM D 4260 – Procedure for preparing concrete for polishing the surface.
ASTM F 1869 – Procedure for testing moisture content in concrete).
The right method for every surface
Holes, dents, mechanical damages, gravel pockets, cracks, seams, undulations (unevenness), etc., require individual attention according to the following detail: Mechanical strength (Pull Off) of the concrete lower than 25 Mpa or concrete with a high absorption capacity – Porusive. This chapter is performed after the end of the mechanical preparation phase.

Applying the primer – impregnating the surface with a low-viscosity, high-permeability epoxy resin without thinners or with two layers of a diluted penetrating epoxy primer of the type: Epoxydan Fluor Primer transparent until a firm and sealed primer layer is obtained, the minimum strength required for proper adhesion of the coating to the surface as well as a sealed layer of the concrete which prevents the release of air during casting which would cause bubbles in the coating. At the end of the process, the mechanical strength of the concrete must reach a minimum of 25Mpa.
Particularly porous surfaces – and with a high absorption capacity, may cause “baldness” (carters/fish eyes) and unevenness of the coating, and therefore it is necessary in this case to carry out the above-mentioned impregnation process. It is recommended to apply an additional layer of primer to ensure perfect sealing of the surface The concrete before being coated with a layer of epoxy ( Epoxidan Fluor 100% or Epoxidan Fluor top paint ) or top polyurethane ( Denbergloss Fluor 100% or Denbergloss Fluor top paint ).
The right method for every surface
Leveling the surface – holes, dents, mechanical damage, gravel pockets: filling, closing and leveling the defects are done using epoxy putty (intended for vertical and horizontal surfaces) of the type “epoxidan flour putty” – the application, after removing all the loose parts and obtaining stable edges, cleaning the dust and applying The epoxy primer. Shrinkage cracks – thermal/capillary cracks: usually caused by the drying process of the concrete, as a result of improper concrete composition or improper curing and their width does not exceed 1 mm, these cracks must be cut with a diamond disc with a suitable V profile to a depth of up to 8 m m and up to 4 mm wide, clean the dust by vacuuming and apply an epoxy primer of the type ” Epoxidan Fluor Primer transparent ” on the sides. When the primer reaches a sticky state, fill and close the crack with a flexible polyurethane putty of the type ” Polyflex Putty 225 A ”

General instructions for preparing an area before painting
“Expansion seams”, dynamic cracks, sawn cracks: caused by displacements, subsidence of the structure or directed (from crack forces). The cracks (accidental – not planned in advance) with a width exceeding 1 mm must be sawn to a depth of 10 mm and a width of 5 mm, cleaning and applying a transparent epoxy fluor primer to the sides, waiting for drying (to a sticky state) and casting of ” Polyplex Seams 225 ” To fill the entire sawn space on the level of the concrete surface. In case of subsidence, additional filling must be done. sawn cracks (“expansion seams”). – do not require expansion (but when filled with an elastomeric material). – Only cleaning, applying primer and pouring Polyplex 225 seams.
The right method for every surface
Lack of flatness – undulations of the surface.: These phenomena must be dealt with after finishing the surface preparation and before applying the coating system. Differences of up to 4 mm can be repaired using ” epoxy grout ” and epoxy putty . The execution after applying the primer. Lack of flatness / undulations with differences greater than 4 mm. – can be regulated on the concrete (before the primer). By casting a leveling cementitious medium with high mechanical strength (minimum 30 Mpa). Or alternatively, if there is no proper curing time for this cement mixture, Level with epoxy grout .
Expansion seams.: These seams are designed in most cases for a width of 25 mm. – and their purpose is to allow certain movements of the structure. The sides of the seams must be polished until a clean and stable surface is obtained. Vacuum, apply a compatible primer and fill with polyplex 225 seams . Spreading. The application of the polyplex after inserting under pressure a backing profile to shape the depth of the seam. (so that its depth is 50% of its width). After finishing the casting of the epoxy floor. – The seams must be copied to the surface.
The right method for every surface
Old concrete : the preparation of the surface is done similarly to the preparation of the surface of new concrete. In the event that the surface is soaked with oils, fuels, chemicals or other pollutants, a cleaning process must be carried out using degreasers and industrial detergents ( Al oil N , degreaser ZX-12 ), subject to the instructions in the standard: ASTM D 4258. This process is done before preparing the surface according to The instructions in the “New concrete” chapter. At the end of the washing, the surface must be bright and clean of pollutants and completely dry. In cases where erosion and weathering of the concrete have created a surface with a compressive strength of less than 25Mpa, mechanical and or corrosive damage – roughness and unevenness, the treatment must be carried out according to the recommendations relevant to these phenomena. It is recommended that at the end of the pollutant removal process, an acidity/alkalinity test is performed in accordance with the standard: ASTM D 4262.
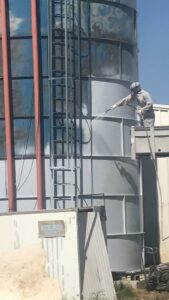
Metal and iron: spraying of aggregates using compressed air (it is recommended to manually remove flaking paint layers, loose rust shells and welding residues using manual or pneumatic scrapers before spraying) to obtain a surface with a cleanliness level of SA 2.5 according to the Swedish standard SIS 055900 in order to remove rust , loose particles, removal of old paint, oil, etc. from at least 95% of the surface according to the American standard – SSPC-SP10, the resulting profile of the surface should reach a roughness level of 80 microns.

General instructions for preparing an area before painting
The right method for every surface
Polish and round all the sharp edges and edges, including the solder lines. Until a minimum radius of 6 mm is obtained. Clean the dust with air pressure (free of moisture and oils) or with a vacuum cleaner. Strip Coat must be applied in all soldering areas. Connections, screws, sharp angles, in order to prevent the formation of early failures in these areas The cleaned areas must receive the first base coat. – As quickly as possible ( epoxy primer antirust or epoxy primer rust converter ). – As close as possible to the end of the spraying of each and every section. – In order to prevent the accumulation of pollutants or rust on the surface.
In cases where it is not possible to spray aggregates. Mechanical or manual means must be used for thorough cleaning using a disc. – Steel brush, sandpaper and scraping. To remove scales, remove rust, layers of loose paint and pollutants. Up to ST-3 cleanliness level according to the Swedish standard. The American standard – SSPC SSPC-SP11, SP3. At the end of the preparation work, the surface must be without sharp edges, rough, without – loose parts, dust, dirt, oil or any other contaminant. In order to ensure good adhesion of the coating to the infrastructure. Recommended top color – Dunbargloss acrylic .

General instructions for preparing an area before painting
The right method for every surface
Plaster walls : (which are not painted) the surface must be clean and dry. Nail and screw heads should be slightly recessed and treated with putty. On the connecting strips between the plates and between the elements, adhesive tapes must be fixed and a matching putty must be applied ( Dunbrash American putty ). The above-mentioned areas must be polished until a smooth and level surface is obtained. Before painting, all layers of dust must be removed. A base layer must be painted – Dunbarcryl 3000 primer . Intermediate paint – full coverage, one layer is enough and a top coat Dunbarcryl 3000 or Dunbarcryl 4000 .
Wood: the surface must be clean, dry, and stable. Do not paint near or during rainy days and in conditions of relatively high humidity. Parts that are not fixed must be removed and polished. Holes and openings must be sealed with wood putty . Weak areas that have aged should be polished and removed. The wood must be polished with 0 sanding paper and thoroughly cleaned of dust. Base layer: transparent sanding sealer before varnish or compact putty before polyurethane paint or before polyurethane varnish or Dunbarcoat before Polydor paint .
Aluminum and stainless steel: see the instructions for preparing the surface in the galvanized iron section. Base – “ epoxide wash primer for stainless steel” and aluminum “ epoxyden strontium chromate ”
The right method for every surface
Galvanized iron: dust, grease and other impurities must be removed from the surface, by washing with detergents (degreaser ZX -12 ) and repeated washing with clean water. In accordance with the instructions in the SSPC-SP1 Solvent cleaning standard, cleaning using solvents ( degreaser M ). After cleaning, the surface must be roughened by chemical or mechanical means. In case of contamination by corrosion products. – The area must be cleaned manually. – or using mechanical equipment in accordance with the SP3 standard (Hand or Power Tool cleaning) SSPC-SP2. Cleaning with solvents is done before using mechanical means. – and its purpose is to remove grease and zinc salts from the surface of the metal. For thorough cleaning, it is necessary to frequently change the solvent and the cleaning cloth. A more effective method is washing with an emulsifier ( to oil N ),
or high pressure hot washing using appropriate detergents ( ZX -12 degreaser ). The roughness of the surface is done by lightly washing aggregates. – To remove grease, rust, scale and loose paint to a level of 1 Sa-. For the surface roughness at a profile depth of – 12 7 microns. According to American standard – SSPC-SP7 Brush Off Blast or mechanical roughing using a steel brush. – and or sandpapers. Before painting, the surface must be clean and dry. Strip Coat must be performed in all the soldering areas, connections, screws, sharp corners in order to prevent the formation of early failures in these areas.
The right method for every surface
Painted areas. – When the existing coating is stable and has an adhesive strength of over 1 N/mm². Fatty layers must be cleaned and removed from the surface intended for coating. – Pollutants and any other foreign matter. Hard surface or glossy finish. – A fine roughness must be roughened until a foundation with a matte finish is obtained. By using fine grit sandpaper. If there is a concern that the new coating may attack the old paint. – The old coating must be completely removed or, alternatively, an intermediate layer (binding layer) must be applied. According to the manufacturer’s recommendations (epoxidan aqua primer). When the surface is peeling or has become obsolete, the surface must be cleaned until a stable foundation is obtained. You can apply a base layer ” Epoxydan Wash Primer ” or ” Galvanized Tutgum “.
Cement plaster.: Adequate curing of the plaster must be allowed for up to 30 days before applying the coating system. During this time the building/hall must be ventilated. In cases of cold and high humidity, heaters should be used. Before starting the work, make sure that the plaster does not contain lime and that the adhesion strength to the infrastructure will not be less than 1.5Mpa. Damaged areas or particularly porous surfaces must be repaired using a fast-drying cementitious putty with an adhesive strength greater than 1 MPa, water-based acrylic putty can also be used for exterior work.
The right method for every surface
The surface should be polished with a fine polish in order to remove dirt and loose parts. In cases where the plaster is soft and has a powdery texture, the surface must be soaked (before applying the coating system) with Denbartex primer diluted with turpentine – for painting with acrylic paints of their types or for coating with acrylic Schlicht . For finishing with upper epoxy paints or polyurethane ” Danbargloss ” a gray epoxy primer must be applied . Before painting or coating work, make sure that the surface is completely dry. Clean, without loose parts and meet the adhesive strength requirements.

 English
 עברית
עברית Русский