Failures in epoxy coating for parking lot floors
Failures in epoxy coating for parking lot floors

Failures in epoxy coating for floors in parking lots in particular and in industry in general
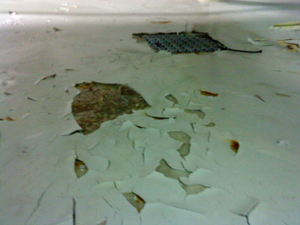
Peeling epoxy – floor coating failures
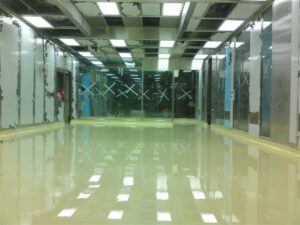
Underground parking lots cover huge areas of thousands of square meters and even tens of thousands of square meters for a single parking lot in malls and commercial centers. Smaller areas for industrial plants and storage halls. All these floors are concrete floors that undergo a beautiful glossy epoxy coating in a variety of shades and markings. Lack of skill and/or disdain for the instructions for preparing the surface are a main cause of failure manifested in peeling, lifting and cracking of the coating which will have to be peeled off and coated again.
Epoxy coating with a suitable thickness for driving vehicles for long-term durability should be about 3 mm, but due to the huge areas in the shopping malls, the laborers are satisfied, due to the price, with a thin layer of 0.5 mm. A thin layer and sensitive to mechanical damage. In factories and warehouses the problem is smaller, they can afford a thicker coating which is of course stronger and will withstand wear and tear for many years. Durability for many years is more important for them, since a repair involves shutting down its activity, a high financial loss, while in parking lots, parts can be shut down for repair without shutting down the entire parking lot.


Peeling epoxy – floor coating failures
Prerequisites for the success of epoxy coating:
- From the concrete area is strong. (Strength test – read below)
- The concrete surface is dry. (Moisture test – read below)
- And the concrete surface was deep diamond polished.
- The concrete surface is well pumped so that the “pores” are opened for the primer to penetrate deeply.
- A layer of thin penetrating epoxy fluor primer (without quartz) was applied to build a deep “root”. For a damp or unfinished floor – epoxy floor primer 450
- Elastomeric treatment of expansion seams. (read below)
- A 100% fluorine epoxy intermediate layer was cast on it while it is still wet, a lot of quartz will be sprinkled to obtain a gas-sealing layer. Something that will prevent bubbles and holes in the final layer. (and will allow a uniform and strong monolithic finishing layer). This layer should be lightly polished the next day and sweep and vacuum excess quartz.
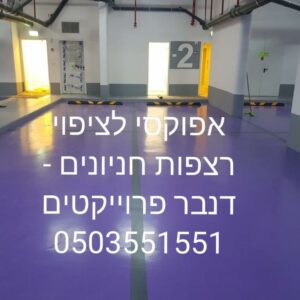
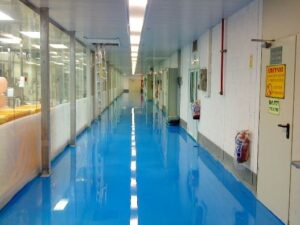
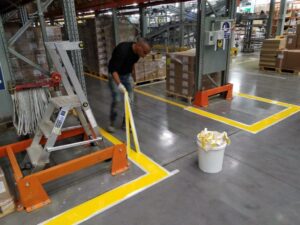
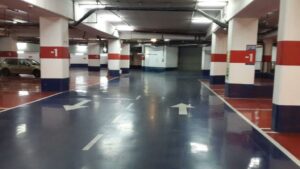
And only after the careful completion of these 7 steps will the decorative finishing coating be carried out in the colors requested by the customer, followed by the parking markings, inscriptions, signs and direction arrows and as required.
Peeling epoxy – floor coating failures
- Testing the strength of the concrete surface
The strength of the concrete is an initial test and is of great importance above all others for the feasibility of an epoxy coating for this concrete surface. Concrete strength for coating should be at least 30 MPa for compression. A test performed by authorized laboratories that drill cylinders for testing. This test can also be performed with an accurate pull-off device that tests the tearing strength of the concrete, a bit problematic because it takes time for the glue to dry, etc. More suitable for the body that orders a laboratory test, they will also take out cylinders for testing, etc. “. But it can also be done with a Schmidt hammer, which is a quick test with a less accurate but more practical immediate result in the field before starting the epoxy coating work. If there are any doubts, it is possible and recommended to order an external laboratory. If there is no programming for a professional test, at least check with hammer blows that the concrete is stable and hard to break. If the concrete is crumbling, do not perform an epoxy coating and you must consult how to strengthen the concrete first.
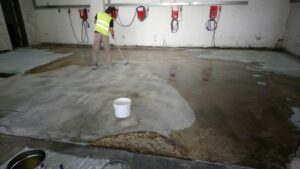
- Checking the dryness of the concrete surface
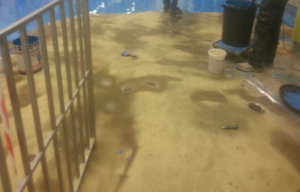
The moisture of the concrete is one of the main causes of the failure of epoxy coatings. Underground parking lots that are not exposed to the sun and are always in a cool and humid atmosphere are very problematic in this respect and a careful humidity test is required before starting casting and if there is humidity above 4%, the surface must be dried until a lower result is obtained. Less than 4% moisture ideal for epoxy casting.
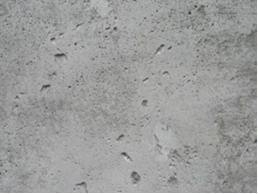
A concrete surface with a lot of water bubbles that have dried and left many holes in the surface – a high probability of the weakness of the concrete and possibly trapped water that has not yet evaporated
Peeling epoxy – floor coating failures
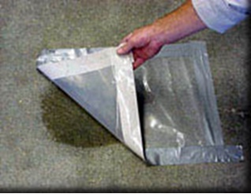
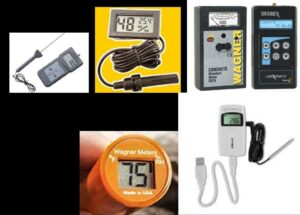
A quick and initial method that is easy to perform is the method of testing moisture with a nylon sheet firmly glued at its ends to the concrete. Evaporation of water from the concrete will accumulate under it, and when you lift the thick nylon the next day, you will see a dark spot in the damp concrete, and there will also be water vapor on the sheet. This test method is done according to the ASTM D4236-83 standard. If moisture is detected and there is a problem with coating, it must be dried with any heating means such as hot air systems, even with a gas stove and live fire and check the moisture percentage. A proper moisture test is performed using an electronic device that measures Humidity of a sensor inserted into a hole in concrete (also like the one found in refrigerators). Or a pipe sensor inserted into a hole in concrete with a small electronic display that reads the level of relative humidity in the concrete. RH – Relative Humidity ASTM F2170 standard
3-4. Polishing and vacuuming
Polishing is performed with a massive three-phase vacuum polishing machine with diamond stones. who grind the top layer of the concrete into dust. So that after thorough vacuuming the concrete will be white, free of impurities and most importantly the “purim” (pores of the concrete) will be open and clean. – As a sponge that is about to absorb the primer layer to maximum depth. To create “roots” as foundations for the coating layers to prevent them from peeling off from the concrete.
Peeling epoxy – floor coating failures
Additional methods for coarser polishing that requires a lot of filling material and is therefore less used:
These are better methods. But removing a lot of the concrete, which will require a lot of epoxy to reset the height. Which significantly increases the cost of the coating.
Method 1 – is shotblast – steel balls that hit and break the concrete shell.
Method 2 – is milling the concrete using a milling machine.
These methods significantly increase the surface area for coating. – and therefore increase the adhesion strength of the coating to the concrete.

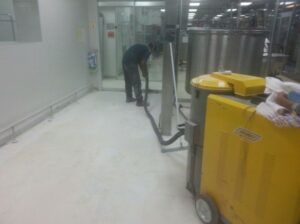
Polishing machine with diamond stones for dry polishing, the machine is connected to an industrial vacuum cleaner
- Primer layer
For the primer layer = foundation. – Of utmost importance as foundations in any building that is built. The foundation layer should penetrate the depth of the concrete to build “roots” as deep as possible. – so that they will “hold” the epoxy coating and not let it come off the floor. The epoxy primer must have a tiny particle size to penetrate deeply.
Peeling epoxy – floor coating failures
- Treatment of expansion seams and repair and filling of cracks and fractures
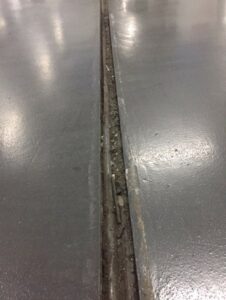
A layer of penetrating transparent primer, sealed expansion seams and putty repairs in holes and dents
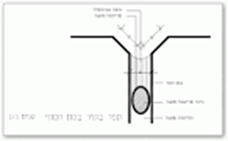
Sketch for proper sealing application with a backing profile in an expansion seam
“Expansion seams”, dynamic cracks, sawn cracks: caused by displacements, subsidence of the structure or directed (from crack forces). The cracks (accidental – not planned in advance) with a width exceeding 1 mm must be sawed to a depth of 10 mm and a width of 5 mm, cleaning and applying a transparent epoxy fluor primer or a one-component polyplex primer to the walls, waiting for drying (to a sticky state) and casting of ” Polyflex Seams 225 ” to fill the entire sawn space on the level of the concrete surface. In case of subsidence, additional filling must be done. Sawn cracks (“expansion seams”) do not require expansion (but to be filled with an elastomeric material) only cleaning,
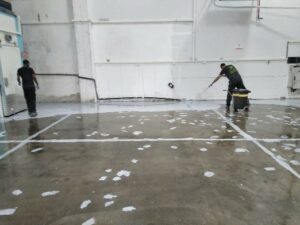
Applying primer and casting polyplex seams 225. Unevenness – undulations of the surface: These phenomena must be dealt with after the preparation of the surface is finished and before the application of the coating system. Differences of up to 4 mm can be repaired using ” epoxy grout ” and epoxy putty . The execution after applying the primer. Lack of flatness / undulations with differences greater than 4 mm. – Can be fixed on the concrete (before the primer). By casting a leveling cementitious layer with high mechanical strength (minimum 30 Mpa). Or alternatively if there is no proper curing time. – (28 days ) for this cement mixture, level with epoxy grout .
Peeling epoxy – floor coating failures
Expansion seams.: These seams are designed in most cases for a width of 25 mm. – and their purpose is to allow certain movements of the structure. The sides of the seams must be polished until a clean and stable surface is obtained . For expansion seams. The application of the polyplex after inserting under pressure a backing profile to shape the depth of the seam. (so that its depth is 50% of its width). After finishing the casting of the epoxy floor, the seams must be copied to the surface.
- A sealing interlayer
the middle class. A transparent epoxy base can be poured with a hardener. A layer of about 0.5-1 mm and spread large amounts of quartz to fill and flood the entire intermediate layer with dense quartz. After drying, light polishing, sweep up excess quartz and vacuum.
- Final layer
Peeling epoxy – floor coating failures
Leveling epoxy coating in the color ordered, mix base with hardener in the correct 2:1 ratio, transfer to another vessel , mix again and immediately pour the entire mixture to prevent heating and deterioration of the material . It is important not to pour from the vessel in which the first mixing takes place. – Because an unmixed epoxy layer remains on the sides and bottom of the vessel. Not mixing completely will give small sections that do not harden and failure of the entire work. Go over the cast surface with a spiked roller to remove bubbles.

See Epoxy Fluor Primer 450 for wet concrete , Epoxy Floor Primer Penetrating Epoxy Fluor Primer Transparent , Epoxy Fluor Primer , Epoxy Fluor Epoxy Floor Coating 100%
 English
 עברית
עברית Русский